[3] 快速學會 SwiftUI 基礎入門


0. 完成成品
這一篇要用 SwiftUI 來製作一個簡單的待辦清單。
本篇文章是一個步驟指導,建議可以搭配影片一起學習:
1. 開啟 SwiftUI 專案
用 Xcode 新建一個 SwiftUI 的專案
2. 建立一個列表
List 可用來呈現列表,但內容必須要自己定義,這邊用 ForEach 來產生 10 個 Text 的內容:
struct ContentView: View {
    var body: some View {

        List {
            ForEach(1...10, id: \.self) { item in
                Text("\(item)")
            }
        }
    }
}
List 的外觀,也可以變動:
List {
    ForEach(1...10, id: \.self) { item in
        Text("\(item)")
    }
}
.listStyle(PlainListStyle())
3. 建立 Navigation View
這邊新增 Navigation View,並且在右上角新增一個按鈕
struct ContentView: View {
    var body: some View {

        NavigationView {
            List {
                ForEach(1...100, id:\.self) { item in
                    Text("\(item)")
                }
            }
            .navigationTitle("Title")
            .toolbar(content: {
                ToolbarItem(placement: .navigationBarTrailing, content: {
                    Button("Add", action: {
                    })
                })
            })
        }
    }
}
4. 跳轉第二頁
新增一個 PageView2.swift 檔案:
struct PageView2: View {
    var body: some View {
        Text("Page2")
    }
}
原本的 Button 修改為使用 NavigationLink:
NavigationView {
    List {
        ForEach(1...100, id:\.self) { item in
            Text("\(item)")
        }
    }
    .navigationTitle("Title")
    .toolbar(content: {
        ToolbarItem(placement: .navigationBarTrailing, content: {
            NavigationLink("Add", destination: {
                PageView2()
            })
        })
    })
}
5. 第二頁的內容
在第二頁的內容,將會以可以編輯個人的基本資料為主:
struct PageView2: View {

    @State var text = ""

    var body: some View {

        VStack {
            Form {
                TextField("To do...", text: $text)
            }

            Button("Add", action: {
            })
        }
    }
}
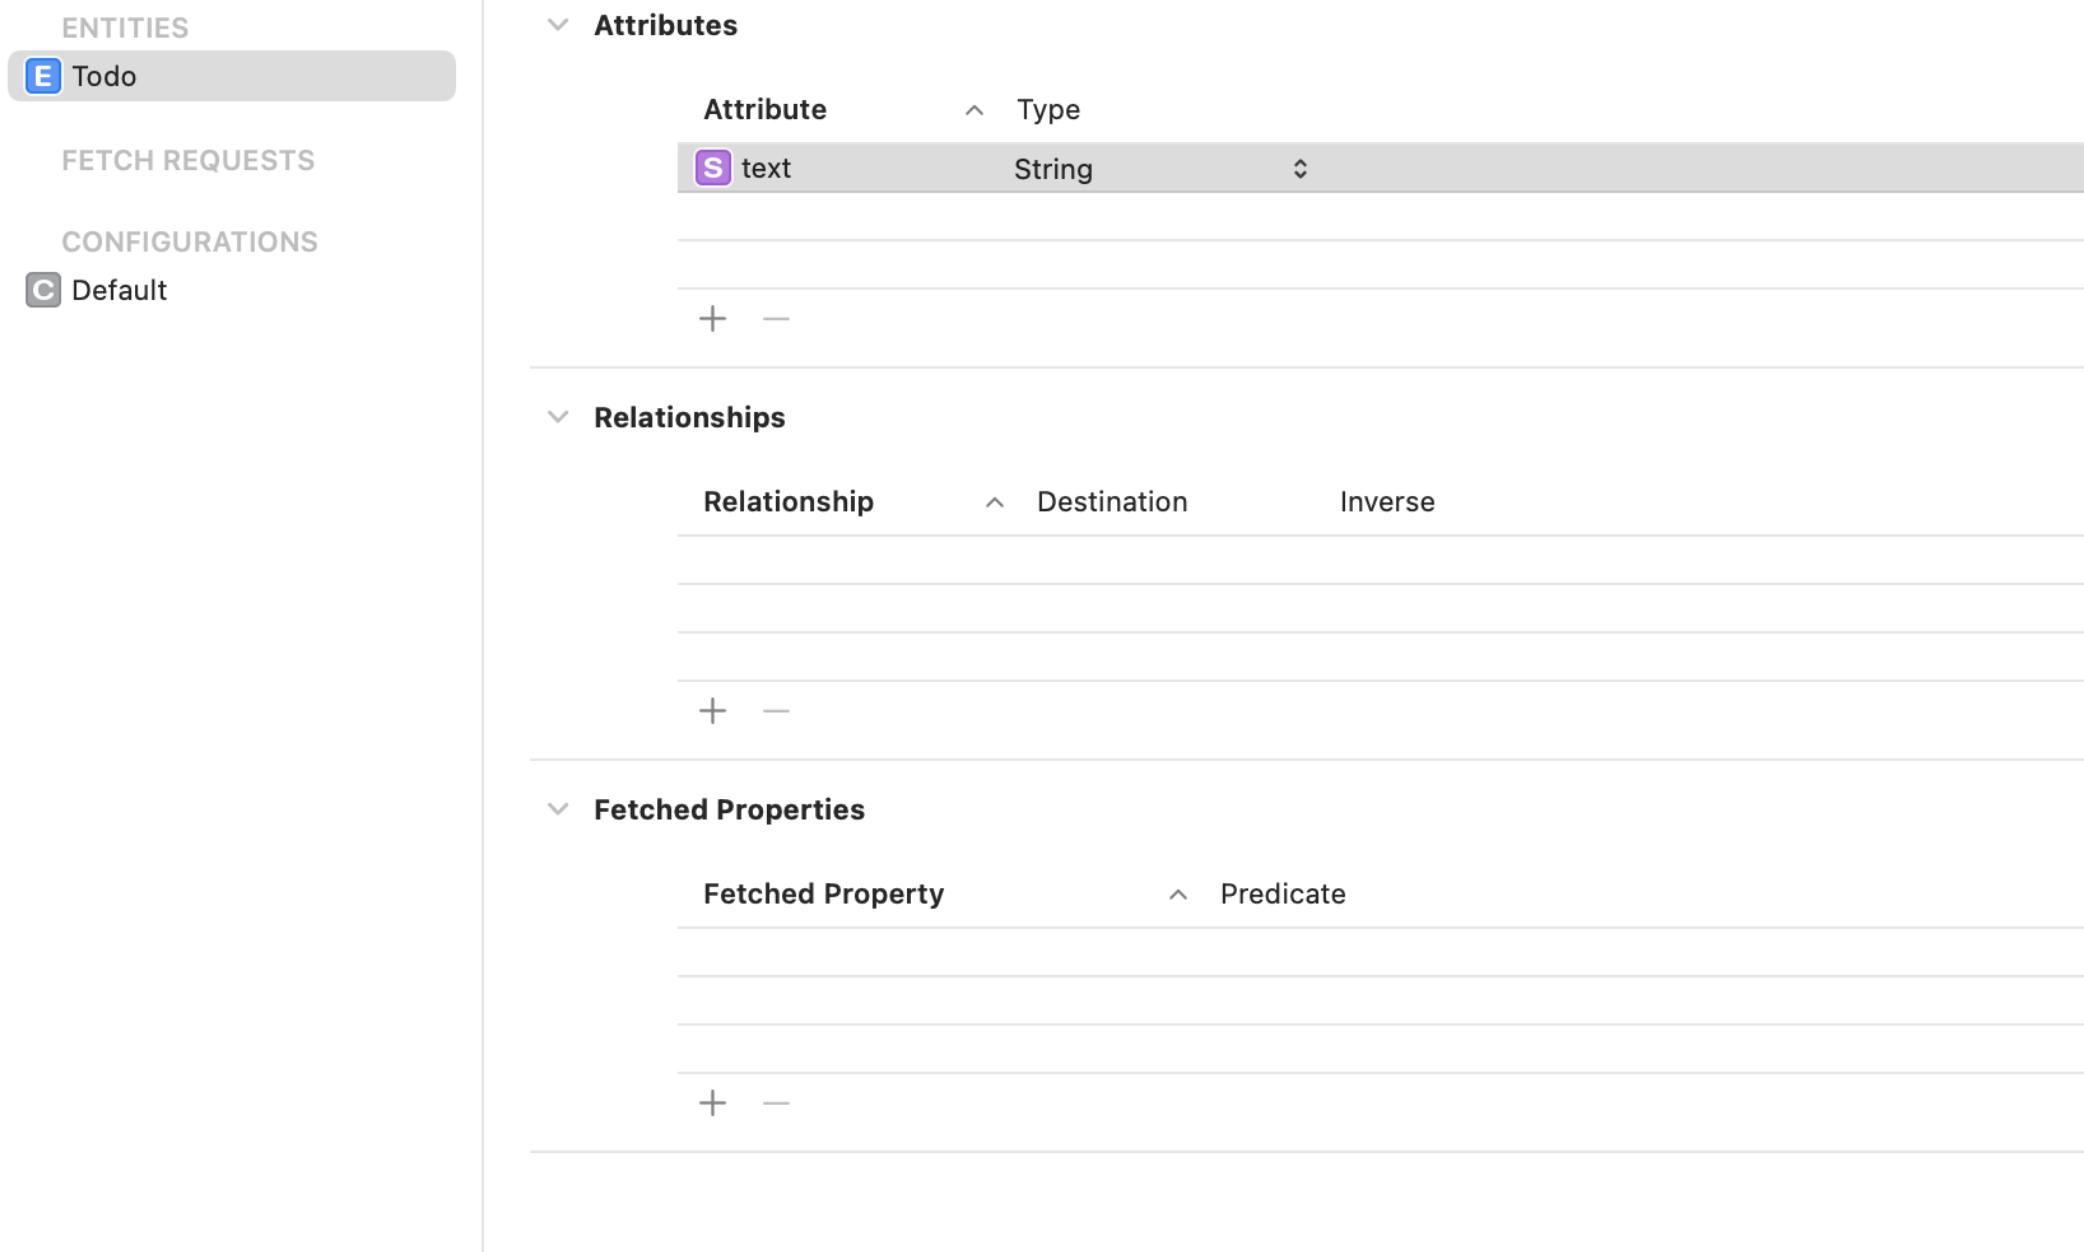
6. 建立資料庫
新增一個 Data Model 檔案,並且在此檔案內新增一個名為 Todo 的 ENTITIES,裡面包含了一個欄位:text,型別為 String
7. 讀取資料庫
新增一個 Persistence.swift 檔案,用這段程式碼來去開啟 Model:
import CoreData

struct Persistence {

    static let share = Persistence()

    let container: NSPersistentContainer

    init() {
        container = NSPersistentContainer(name: "Model")
        container.loadPersistentStores(completionHandler: { (storeDescription, error) in
            if let error = error as? NSError {
                print(error)
            }
        })
    }
}
8. 修改主程式
在 App 一開始啟動時,就直接開啟資料庫,並且使用 Environment 傳入,修改如下:
@main
struct TestSwiftUIApp: App {

    let persistence = Persistence.share

    var body: some Scene {
        WindowGroup {
            ContentView().environment(\.managedObjectContext, persistence.container.viewContext)
        }
    }
}
9. 將資料寫入到資料庫
在第二頁的內容當中,要將 TextField 所輸入的資料寫入到資料庫中,修改如下:
struct SwiftUIView: View {

    @Environment(\.managedObjectContext) var viewContext
    @State var text = ""

    var body: some View {

        VStack {
            Form {
                TextField("To do...", text: $text)
            }

            Button("Add", action: {
                let todo = Todo(context: self.viewContext)
                todo.text = self.text

                do {
                    try self.viewContext.save()
                } catch {
                    let error = error as? Error
                }
            })
        }
    }
}
10. 回到上一頁
按下按鈕後,除了儲存資料外,也要自動跳轉回到上一頁
@Environment(\.presentationMode) var presentationMode
self.presentationMode.wrappedValue.dismiss()
完整程式碼修改如下:
struct SwiftUIView: View {

    @Environment(\.presentationMode) var presentationMode
    @Environment(\.managedObjectContext) var viewContext

    @State var text = ""

    var body: some View {

        VStack {
            Form {
                TextField("To do...", text: $text)
            }

            Button("Add", action: {
                let todo = Todo(context: self.viewContext)
                todo.text = self.text

                do {
                    try self.viewContext.save()
                } catch {
                    let error = error as? Error
                }

                self.presentationMode.wrappedValue.dismiss()
            })
        }
    }
}
11. 讀取資料庫
在第一頁中,使用 FetchRequest 方式將資料讀取出來:
struct ContentView: View {

    @FetchRequest(entity: Todo.entity(), sortDescriptors: [])
    var todos: FetchedResults<Todo>

    var body: some View {

        NavigationView {
            List {
                ForEach(todos) { item in
                    Text(item.text ?? "")
                }
            }
            .navigationTitle("To Do Lists")
            .toolbar(content: {
                ToolbarItem(placement: .navigationBarTrailing, content: {
                    NavigationLink("Add", destination: {
                        PageView2()
                    })
                })
            })
        }

    }
}
12. 左滑刪除
在 List 之中,可以新增左滑刪除的功能:
List {
    ForEach(todos) { item in
        Text(item.text ?? "")
    }
    .onDelete(perform: delete)
}
所以這邊就必須要新增 delete 的函式:
func delete(offsets: IndexSet) {
    if let index = offsets.first {
        let todo = todos[index]
        viewContext.delete(todo)

        do {
            try self.viewContext.save()
        } catch {
            let error = error as? Error
        }
    }
}